Pure Vanilla Extract

***This week’s food photography by Mara Rothbart***

I’ve been looking for ways to expand my repertoire of naturally sweetened desserts.  With the absence of white sugar, it seems important to make sure the other flavors are of great quality in order to achieve great taste. Thus, committed to using the best ingredients, I wanted to find some really great vanilla.  After looking in a few specialty shops, I realized most places carry the same brands.  The same $16/bottle brands, might I add.  Is this reasonable?  I guess if I want top quality, I have to be prepared to spend top dollar, but I wasn’t convinced my search was over so I let it rest for a while.

Fast forward…I go to see the New York Botanical Gardens annual Orchid Show.  It’s incredible.  They have over 300 types of orchids displayed on trellises, fountains, and chandeliers and you’re literally transported to a tropical wonderland of beauty.  Wasn’t it winter, like, a day ago?  Not anymore!  Spring is here and suddenly I’m standing in an 80 degree conservatory surrounded by gorgeous flowers.  Call me a Miami girl, but suddenly nothing could make me happier.  Humidity?  Bring it on.

Anyway, while walking through this orchid fantasy world in the Bronx, we come across the vanilla orchid.  Yep…I had the a-ha moment.  Here’s how it goes…vanilla beans are actually the fruit of the vanilla orchid.  The plant flowers and produces the pods, which hang down, ripen and are eventually harvested to make vanilla extract.  Pretty cool stuff, but you know what’s even cooler?  Making my own vanilla.

Forget spending $16 dollars a bottle, instead I’ll just spend $2 a bean.  To be honest, after purchasing all of my ingredients this actually saves me no money.  But that’s fine.  What I’m losing in dollars, I’m making up for in awesomeness.  All it takes is some cheap vodka, a few vanilla beans, and in about 6 weeks it’s ready.  It can even steep for longer if you’d like.  More soaking equals more flavor.  Mmm…this is going to do wonders for us all.

Vanilla Extract

  • 4 Vanilla Beans
  • 1/2 cup Vodka

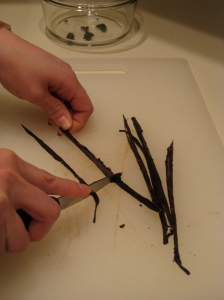
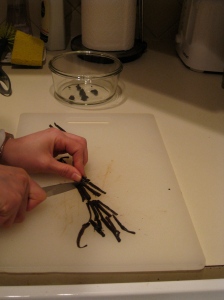
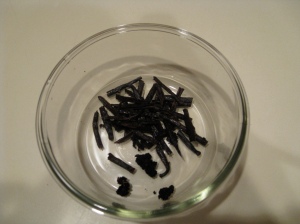
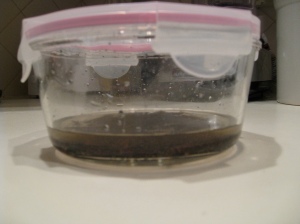
Split each vanilla bean pod lengthwise down the middle.  Using the edge of a knife blade, scrape out the beans and place them in a jar.  Cut the bean pods into quarters and place into jar.  Add the vodka.  Tightly screw on lid and store in a dark place for 5-6 weeks.  Lasts until it’s gone!


Crispy Chickpeas

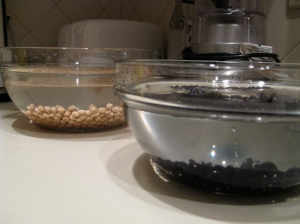
A couple weekends ago I ate an awesome 3 Bean Salad and I was inspired to recreate this masterpiece for the QLK.  It took A LOT of effort.  Wanting to give it my all, I decided that instead of buying canned beans, I would go through the process of buying dried ones, soaking them for 12 hours, and then cooking them for another hour and a half. Somewhat to my surprise, the beans came out perfectly.  In the past, a couple of my bean cooking endeavors resulted in pots of bean-mush, so when that didn’t happen, I took it as a good omen.  Not so much.

The salad was composed of green beans, black beans, and chickpeas, and I dressed it with a roasted shallot-walnut vinaigrette.  I assumed that something this simple would be difficult to mess up, especially after getting over the bean hurdle, but unfortunately I was wrong.  The vinaigrette was disappointingly boring and the salad itself was in dire need of some onion and/or fresh herbs, neither of which I had in my kitchen at the time.  Needless to say, the recipe will not be posted.

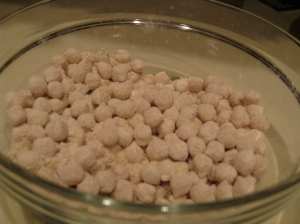
Determined to avoid complete failure, I set out to make use of the enormous container of perfectly cooked chickpeas now sitting in my fridge.  These beans would not be relegated to mere salad toppers!  I searched for recipes and I came across this one on the Food and Wine website.  It was immediately appealing because it was flagged as a staff favorite (these people eat for a living), and since I already have a high success rate with the recipes in this mag, I knew it was a safe bet.  Thus, the perfect snack was born!  The beans are coated in a yummy mix of ground coriander, cumin and salt.  Flavorful, crispy, and delicious.  Healthy?  Ehh, we all need to indulge every once in a while.  At least we’re not eating potato chips.

Moral of the story…cook your beans and then fry them if all else fails.  The end.

Crispy Chickpeas

(adapted from Jason Travi on Food and Wine.com)

  • 2 cups cooked chickpeas (either canned or dried)
  • 1/2 cup toasted sesame oil (original recipe used vegetable oil)
  • 1/2 teaspoon ground cumin
  • 1 teaspoon ground coriander
  • 1/3 cup flour (I used whole wheat)
  • Sea Salt to taste

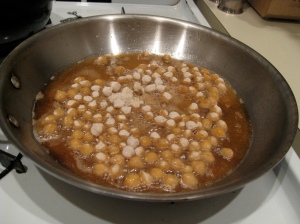
Heat the oil in a pan for about 2-3 minutes.  Place the chickpeas in a bowl and toss with cumin and coriander.  Add the flour and mix so that they are evenly coated.  Using a mesh strainer, tap off the excess flour.

Pour half the chickpeas into the pan.  Cook for about 8 minutes until brown and crispy.  Using a slotted spoon, remove from pan and place on a paper towel lined cookie sheet to drain.  Repeat with the remaining chickpeas.  Add salt to taste.  Snack away!


Coconut Date Snowballs

I sincerely believe that life isn’t worth living without dessert.  When people tell me they don’t have a sweet tooth, I look at them like they’re from another planet.  Do you really not eat cookies??  Are you not enticed by ice cream??  Liars.  That’s what all you dessert-deprived aliens truly are.  I pity you, but I don’t blame you.  The truth is that sugar is seductive and evil, and unfortunately, it packs on the pounds like nothing else.  Being well aware of these facts, I still refuse to abandon dessert and I’m committed to satisfying my sweet tooth while still fitting into my favorite jeans.  That’s right, I want to have my cake and eat it too.  Staying fit and enjoying dessert do NOT have to be mutually exclusive.

The trick, my friends, is to use natural sweeteners as much as possible (ie, honey, maple syrup, dates, etc.).  Unlike refined sugar, these substances do not wreak havoc on our bodies; instead, they provide delicious taste while also providing nutritional value.  In an effort to drastically reduce the amount of refined sugar I consume, the QLK has become a test kitchen for natural desserts galore!

Upon researching ideas for naturally sweetened desserts, I remembered loving the Glaser Farms coconut date snowballs at the Coconut Grove Farmer’s Market.  They’re soft and chewy with the perfect amount of sweetness and a hint of coconut.  I always make a point of buying a box when I come to town and I always toy with the idea of making them, myself.  Since I couldn’t find the recipe, I decided to come up with my own version, and believe me, these are good.  I know what you’re thinking…date snowballs?  Really?  YES.  I would eat these any day of the week.  Which is why I chose to begin making these badboys at 10pm on a Thursday night.  They’re that good.

So put away the cookie jar and try something new.  If it’s been approved by a self-proclaimed sugar addict, such as myself, you know it’s worth a shot.  While you’re at it, put on your skinny jeans…as long as you’re eating these, you might be able to stay in them for a while.

Coconut Date Snowballs

  • 2 cups chopped, pitted dates
  • 2/3 cup water
  • 1 teaspoon vanilla extract
  • 1 cup shaved almonds
  • 1 cup shredded dried coconut (unsweetened)

Place chopped dates in a small saucepan.  Add water and bring to a simmer.  Stir occasionally…as dates begin to soften, they’ll become easier to to mash up.  (You may need to add more water if they become too dry.)  Simmer for about 10 minutes until dates are very soft and thick, resembling a paste.  Remove from heat and stir in vanilla.

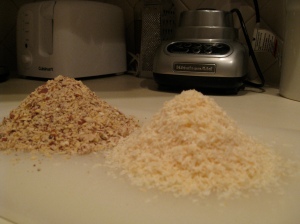
Grind almonds in a blender or food processor.  They should be somewhat powdery, but not too fine.  Transfer almonds to a bowl.  Add date mixture to the blender and puree to desired consistency.  (They’re much easier to work with when there are not large chunks of date.  I pureed for about 30 seconds to make a smooth paste.)

Add date mixture to the crushed almonds in the bowl.  Mix well to incorporate.  Place shredded coconut on a flat surface such as a plate or a cutting board.  Line a cookie sheet with wax or parchment paper.  Using a tablespoon (or smaller), take a scoop of date-almond mix and roll into ball shape.  Roll the date balls around in the coconut and place on cookie sheet.  When all of the mixture is used, place cookie sheet in the refrigerator for at least 30 minutes.  For harder snowballs, leave in for longer.