Miso-Glazed Sole with Roasted Brussels and Cabbage Salad

Spring is just around the corner and that means it’s time to get in shape!  (Goodbye Sunday night pasta dinners…you’re so last season.) Start off the week with some lean protein and vegetables to set the tone of eating healthy and feeling great.  Eating fish is soooo good for you…its filled with iodine, zinc and vitamins A and D.  Salmon is especially awesome because it contains omega-3 fatty acids, which are essential for keeping our minds sharp.  In the past, I’ve tended to avoid making fish at home because I always felt like it’s difficult to make it as well as a restaurant does.  However, this recipe changes that notion completely.

Cooking fish is actually super easy.  Aside from marinating, it takes less than 15 minutes to prepare so you’ll be eating in no time.  Marinating is not essential, but I recommend it because you can have a flavorful, restaurant-quality meal without paying restaurant-quality prices.  Miso is a great marinade because it has a nice sweet/salty balance.  I’ve also used miso in sauces, dressings and soups and it never fails to take things to the next level.  Plus, one container lasts a long time in your fridge, so you don’t have to go on a miso binge for a week every time you buy it.  On the other hand, this recipe is so good you may just want to make it every night this week, so binge away…you have my blessing!

I found this roasted brussels and cabbage recipe on the Food and Wine website.  I love using their recipes because they’re mostly from acclaimed chefs and 99% of the time delicious.  This salad worked well with the fish because the dressing doesn’t overpower the miso flavor.  It’s an interesting dish because it has a lot going on – cooked brussels, raw cabbage, toasted pine nuts, sweet dried cranberries and creamy parmesan.  How could you go wrong?  Brussels and cabbage are also both really hearty so they’ll fill you up without the guilt.  As I mention below, I think this dish would also be great if the cabbage were cooked down and served warm.  Either way, I think it’s a winner so put on your chef’s hats and enjoy!

Miso-Glazed Fish

  • 1/4 cup mirin (Japanese rice wine)
  • 2 Tbsp light yellow miso (I used white)
  • 2 Tbsp honey
  • 2 Tbsp soy sauce
  • 2 lbs of your favorite fish (Salmon, Halibut, Swordfish, Cod, Sole, etc.)

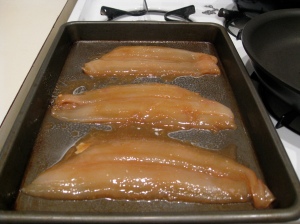
Combine the ingredients in a bowl and add fish.  Coat evenly, cover, and refrigerate for at least 30 minutes or up to 2 hours max.

Preheat the oven to 450 degrees.  Place marinated fish on a baking pan and for 6-9 minutes depending on size.  Feel free to also grill or pan-sear your filets.

Roasted Brussels with Cabbage and Pine Nuts

Adapted from Food and Wine, Feb 2011

  • 1/2 cup pine nuts
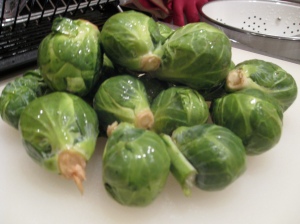
  • 1 lb brussels sprouts, quartered
  • 6 Tbsp olive oil
  • salt and pepper to taste
  • 3 Tbsp fresh lemon juice
  • 2 Tbsp honey
  • 2 tsp dijon mustard
  • 1/8 tsp cayenne pepper
  • 1/2 tsp pure chile powder, such as ancho (I left this out)
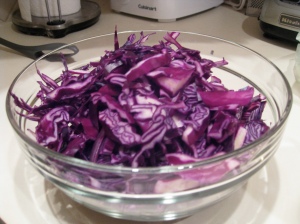
  • 1 1/2 lbs red cabbage, thinly sliced or chopped (6 cups)
  • 1/2 cup dried cranberries or dried cherries
  • 4 garlic cloves, thinly sliced
  • shaved parmesan cheese

Preheat the oven to 450 degrees.  Toast the pine nuts for about 3 minutes.  Keep an eye on them because they’ll burn quickly.  Remove from oven and set aside.

Combine the brussels with 1 tablespoon of olive oil, salt and pepper, and spread out on a baking pan.  Roast for about 15 minutes until the bottoms are lightly caramelized.

Meanwhile, in a small bowl whisk together the lemon juice, honey, mustard, cayenne, and chile powder (if using).  Slowly whisk in 1/4 cup of olive oil, salt and pepper.

In a large bowl, combine the cabbage with the toasted pine nuts and dried fruit.  Heat the rest of the olive oil in a small pan and cook the garlic for about a minute.  Pour over cabbage mixture and add brussels.  Toss together with dressing, add the shaved cheese and serve.

Note: This salad is meant to be room temperature, however, I think these ingredients taste great warm.  Instead of pouring the hot oil/garlic mixture over the cabbage, I added the cabbage to the pan and cooked it down for a few minutes.  You can cook it as long as you’d like.  Longer time on the stove=softer cabbage=yum.


Pureed Squash and Pear Soup with Kale

So we had one 50 degree day last Friday and everyone rejoiced.  New Yorkers came out of hibernation and filled the streets for one fleeting day of warmth, hoping that it marked the end of this painful winter.  Sadly, we were all wrong.  It’s still February, and I’m still FREEZING!  Back to the puffy jacket, hats and gloves…back to dreams of warm weather.
In light of such disappointment, I suggest cheering up with a steamy bowl of soup.  If you close your eyes, you can even pretend you’re in Miami or LA.  (For those of you who are, consider yourselves privileged!)  Soup is one of my favorite things to make because it’s cheap, filling, and one pot will last you a few days.  It’s also super healthy…you can thank me next week when you’re feeling skinny and rich!
As I always advocate eating locally and seasonally, this recipe is especially good because it incorporates winter squash.  It’s coming to the end of its season so enjoy it while you still can!  The combination of the acorn squash and pear gives the soup some sweetness, and the ginger and 5-spice add an interesting twist.  Definitely don’t skip out on the mushrooms – they’re the best part.  If you don’t have shiitakes, any variety will do.
I have to admit that peeling the squash was the most difficult part of the process, so be sure to leave yourself at least an extra 20 minutes for that step alone.  The best method is to cut the squash in half, remove the seeds, then cut it into smaller chunks and peel each one individually.  The end justifies the means, I promise.
If you’re really feeling frisky, I recommend toasting the squash seeds instead of throwing them away.  You can season them as you like and use them as a soup topping or an anytime snack.  They’re a great source of protein and incredibly tasty.  See recipe below…
Pureed Squash and Pear soup with Kale
Adapted from Veganomicon
  • 4 Tablespoons of olive oil
  • 1 yellow onion sliced thin
  • 1 red pepper sliced thin
  • 1 teaspoon of ginger
  • 2 garlic cloves, minced
  • 1/2 teaspoon of salt
  • 1/4 teaspoon Chinese 5-spice powder
  • 2 acorn squashes, seeded, peeled, cut into 3/4 inch chunks
  • 2 firm pears, peeled, seeded and cut into thin slices
  • 4 cups vegetable stock
  • 4 stalks of kale, stems discarded roughly chopped
  • 1 1/2 cups of shiitake mushrooms, sliced in half
  • 1 tablespoon of soy sauce

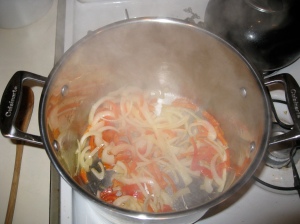
Preheat 2 Tbsp of olive oil in a large stockpot over medium heat.  Saute the onions and peppers for about 10 minutes until lightly browned.  Add the ginger and garlic and cook for another minute.  Add the salt, 5-spice, squash, and pears and stir to incorporate the ingredients.  Add the vegetable stock and bring to a boil.

Once boiling, lower the heat to a simmer and cook for about 20 minutes or until the squash is tender.  Take a bite…it shouldn’t be crunchy.  Puree and return soup to the pot.  (The best way to do this is in batches.  Puree half, pour it into a bowl, then do the other half.  If you’re using a blender, be careful not to burn yourself since the tops have a habit of popping off.  Trust me…squash soup explosions are painful and messy.)  Add the kale and cook until it softens.

In a separate pan, heat the remaining 2 Tbsp of olive oil.  Add the mushrooms and cook for about 5-7 minutes until they’re soft.  Add the soy sauce and cook until absorbed.  Top each bowl of soup with some shiitakes.  Enjoy!

Variation: For a heartier soup, add one can of any type of bean.  I’ve tried it with adzuki beans and they were delicious.  White beans, red beans, mung beans would also be great.  Add them in at the same time as the kale.

Toasted Squash (or Pumpkin) Seeds

  • 1/2 cup seeds
  • 2 cups water
  • 1 tablespoon salt

Preheat oven to 400 degrees.  Combine the ingredients in a small saucepan and bring to a boil.  Reduce heat and simmer for 10 minutes.  Drain seeds and place on a greased cookie sheet.  Add additional seasoning, if desired.  Bake for 15-20 minutes until golden brown.


Carrot Quiche

What to do on a NY Saturday morning when the sun is shining and the city is your oyster?  Go to the Union Square Farmer’s Market, of course.  Never gets old.  What’s better than strolling around in the fresh air and scoring free samples?  It’s like costco – minus the microwave, the processed ingredients, and the creepy warehouse environment.  Ok, maybe it’s nothing like costco, but the fact remains, most of us LOVE free samples.

If you’re anything like me, you’ll want to buy everything you taste.  I found myself wandering around in circles trying to make a decision about what to purchase.  Part of the problem (or the fun) is that I had yet to decide what I wanted to make that day, and subsequently, there was no shopping list to stick to.  Luckily, the fact that it’s winter and harvests are pretty limited to root vegetables right now makes my decision a bit easier.  I committed to just picking out what looked good.  Luckily, I only had two canvas grocery bags and a limited amount of cash so I couldn’t go too overboard.  (Who am I kidding?  That has never stopped me in the past.)

The winner…CARROTS.  I bought three pounds with no idea what I was going to do with them.  Little did I know that finding a recipe that didn’t contain the phrase ‘carrot cake’ in the title would be a difficult endeavor.  Not that I have anything against carrot cake, but I know myself too well to keep one in the house.  If you’re laughing right now, it’s because you know I’ll sit around eating it all day, and you’re right, I would, so that option was out of the question.

After perusing all of my cookbooks and favorite cooking blogs, I was feeling uninspired, which is when I decided to take matters into my own hands.  I combined some recipes and came up with carrot quiche.  This is not to say that it’s never been done before, but it’s pretty hard to come across when you’re googling ‘carrot recipes,’ and after tasting it I have no idea why.  The carrots still retain their flavor while immersed in a warm eggy, cheesy mix and surrounded by a flaky crust.  Quiche is the perfect meal…it’s packed with plenty of protein and nutrients, and you can eat it for breakfast, lunch or dinner and still be perfectly satisfied.  Keeping it healthy, I opted to make a buckwheat crust, which actually worked well with the flavors.  If buckwheat isn’t your style,  any flour will do, so feel free to modify as you like.

Carrot Quiche

Crust:

  • 1 cup of buckwheat flour
  • 1/2 tsp sea salt
  • 1/3 cup cold butter
  • 4-5 Tbsp ice water

Filling:

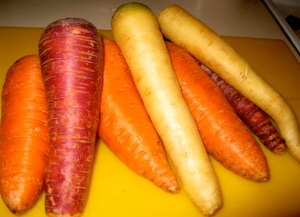
  • 3 cups of sliced carrots (any variety)
  • 4 eggs
  • 1 cup of shredded gruyere cheese
  • 1/2 cup heavy cream
  • 1/2 tsp salt
  • 5 springs of fresh thyme
  • Pinch of nutmeg (optional)
  • Black pepper to taste

Make the crust.  Sift flour and salt in a large mixing bowl.  Slice butter into 6 pieces and work it into the flour until it’s crumbly.  Add the water one tablespoon at a time and knead the dough until it forms a ball.  Wrap in plastic and press into a disc shape.  Refrigerate for at least 30 minutes before rolling.

Preheat oven to 425 degrees.  Remove dough from plastic and roll out on a floured surface.  Be sure to flour the rolling pin first to avoid the dough sticking.  Roll out until the dough is about 1/4 inch thick, or spread enough to fit a 9″ pie dish.  To be honest, this step was difficult because the dough began to split.  If this occurs, just piece it back together in your pie dish.   Pierce the dough about 5 or 6 times with a fork.  Place some dried beans in enough tin foil to cover the surface (or use pie weights if you have them) and bake for 12-15 minutes.  This last step is to prevent the crust from puffing up in the middle and around the sides.  Remove from oven when its slightly crisp.

Place sliced carrots in a pot of boiling water and cook until tender (about 10 minutes).  Meanwhile, in a medium bowl, beat eggs.  Add cream, thyme, nutmeg, salt and pepper.  Arrange cooked carrots in the pie dish and pour liquid mixture over the top.  Add the cheese.  Sprinkle with black pepper.  Bake at 350 for 50 minutes.  The quiche is ready when the sides are golden brown and the middle is set.  Let stand for 10 minutes before serving.


Healthy Snacking 101: Roasted Vegetables and Nut Butters

Finding healthy snacks is pretty difficult, especially if you’re appetite is as big as mine.  Solution?  Roast up some some veggies in the beginning of the week and keep them in the fridge for guilt-free, week-long munching.  For something a bit more adventurous, I recommend making your own nut butter…healthy, filling, delicious!

Simple Roasted Vegetables

Head to your local farmer’s market or the produce aisle in your favorite grocery store and pick up whatever catches your eye. Some of my roasting favorites are carrots, broccoli, cauliflower, squash, sweet potatoes and brussel sprouts. The best news is these veggies are all so naturally tasty that you barely need to do any work.  They’re also packed with tons of cancer-fighting vitamins and minerals so you can feel like you’re giving your body a well-needed nutrient boost after the abuse it took over the weekend.  (Hint: go for dark greens and oranges to maximize your nutrient intake.)  All you need is an oven, a roasting pan, some olive oil, salt and pepper and you’ll have a tasty treat in no time.

  • Seasonal Veggies
  • 2-4 Tbsp Olive Oil
  • Salt and Pepper to taste

Preheat your oven to 400 degrees. Chop vegetables.   Try to cut them all the same size so that cooking time doesn’t vary.  If using carrots, make sure they are scrubbed and peeled.  I like to cut mine in half both lengthwise and across.  For brussels, cut in half lengthwise. For sweet potatoes, cut into equal sized wedges.  Place chopped veggies into a large bowl and drizzle with 2-4 Tbsp olive oil. Make sure they are evenly coated but not drenched.

Place on a roasting pan and roast for 20 – 30 minutes. I like to take mine out and check after about 20 minutes. Vegetables should be soft and brown on the bottom.

Note: brussels…so hot right now. These babies tend to take longer. Leave them in for an extra ten minutes until they are soft and their outer layer is carmelized. So delicious when done right.

The same goes for your sweet potato wedges.  Leave em in until they’re crispy.  This is the closest thing you’re gonna get to french fries without the calories.  Rejoice.

Cashew Butter

Nuts are a great source of protein and keep you full for hours.  Unfortunately, packaged nut butters are filled with sugar and sodium, which puts them on the list of things to avoid.  However, I assure you that making your own is so simple that you’ll never want to buy it again.  Plus, you can decide how salty/sweet to make it, and avoid loading up on those hidden calories.

  • 2 cups of cashews
  • 2-3 Tbsp flax oil or peanut oil
  • 1 tsp maple syrup (optional)

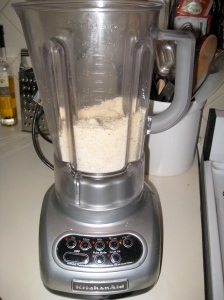
Place cashews in a blender or food processor.  Spin until they’re finely chopped into a powder.  Add the oil and blend.  Scrape down the sides, add maple syrup if you’d like, and continue to add more oil until you reach desired consistency.  Spread on toast…enjoy!


I have a blog!

Hooray!!!
Bring your appetite…this blog is gonna be tasty…